I need a framework for develop desktop/mobile apps. And I don't know how to choose:
Sencha or JQMobile / jQuery Touch?
http://cfc.kizzx2.com/index.php/sencha-touch-vs-jquery-mobile-a-first-look/
May 30, 2012
May 17, 2012
The best Guide to install Facebook comments in your website
I found the best guide to implement Facebook comments in your website:
http://wp.tutsplus.com/tutorials/the-ultimate-guide-to-implementing-facebook-comments-on-your-blog/
http://wp.tutsplus.com/tutorials/the-ultimate-guide-to-implementing-facebook-comments-on-your-blog/
Using Facebook Comments on your blog offers your readers a way to instantaneously comment on posts, as well as to share them without having to do any work. If you think this type of commenting system will suit your audience, read on to find out how you can implement it the right way.
Step 1: Create A Facebook App
Before you actually generate the Facebook Comments code and implement it on your blog, you need to create an app for your site.
- Go to developers.facebook.com
- Click Apps
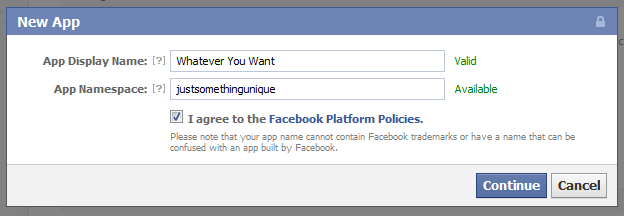
- Click Create New App
- Enter an App Display Name and Namespace
On the next screen, you’ll see your newly created app’s App ID and App Secret Key. You won’t need the secret key, but the App ID will be used later. Take note of it.
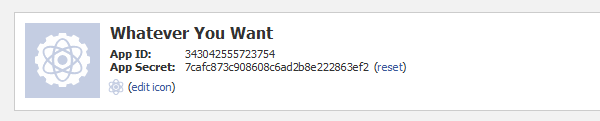
Below these keys, go ahead and fill out the Contact Email and App Domain (your blog’s domain). Go down and click on Website. Fill in the same domain that you used for the App Domain. Click Save Changes.
Step 2: Insert the Facebook Comments Code into Your Theme
In this tutorial, we’ll be implementing Facebook Comments alongside the default WordPress comment system instead of replacing it. If you want, you can head over to the Facebook Comments code generator to get the code you’ll need for inserting the comment system; however, I’ve included it here so you can just copy it. You’ll need to customize a few parts of it, however; I’ll note which parts those are for each block.
The code block below should be placed in your theme’s header.php file. Find the opening tag and paste the block directly below it. On the 6th line, replace “Your App ID Here” with your App ID.
- <div id="fb-root">div>
- <script>(function(d, s, id) {
- var js, fjs = d.getElementsByTagName(s)[0];
- if (d.getElementById(id)) return;
- js = d.createElement(s); js.id = id;
- js.src = "//connect.facebook.net/en_US/all.js#xfbml=1&appId=Your App ID Here";
- fjs.parentNode.insertBefore(js, fjs);
- }(document, 'script', 'facebook-jssdk'));script>
While you’re still in your header.php file, go up into the section and paste this block of code somewhere. It will ensure that the Facebook Commenting system on your blog posts knows it’s owned by the app you created before. Replace the “Your App ID Here” bit with your App ID (leave the quotes in place).
- <meta property="fb:app_id" content="Your App ID Here"/>
The next code block should be placed in your theme’s comments.php file. Since we’re implementing Facebook Comments alongside WordPress comments, you’ll just be pasting it where you want the Facebook Comments box to appear, and you won’t be deleting any of the original code.
- <div class="fb-comments" data-href="" data-num-posts="2" data-width="470" data-colorscheme="light" data-mobile="false">div>
If you generate your Facebook Comments code from the link I gave you earlier, instead of just grabbing it from this tutorial, remember to change the data-href attribute from the original URL to , otherwise Facebook Comments won’t work.
You can also edit the data-num-posts, data-width, and data-colorscheme attributes to your liking. The first defines how many comments will be shown on each post before a user needs to click “See More”, the second defines the width of the commenting system (set it to something slightly smaller than your content area’s width), and the last is the color scheme, which can be set to “light” or “dark”
Subscribe to:
Posts (Atom)